Saturday 5 December 2015

Blender Kaluha and Cream Chocolate Mousse

This is the best dessert, ever! It's decadent, rich, velvety and oh so good. Not to mention no bake, make ahead and super easy. A great addition to your holiday arsenal. Your company will be so impressed. They will never know how quick and easy it was to make.


You do require a blender to make this awesome dessert. It doesn't have to be a super duper blender. Just a plain old, every day blender will work.


Add the chocolate chips to the blender. I have used Ghiradelli premium bittersweet chocolate chips and chipits brand semi-sweat chocolate chips.


Add the eggs, Kahlua, sugar, coffee powder, vanilla,and salt to the blender. Pulse the mixture a few times to break the chocolate up.


Bring the cream to a boil. Watch it carefully, it will scorch easily.


Pour the hot cream over the chocolate mixture in the blender.


Blend for three minutes.


Pour into small containers. This dessert is very rich. You don't want a huge portion. Refrigerate until firm. It should take an hour or so.


These guys are going to work with me tomorrow


When the chocolate has set, add the Kahlua flavoured whipped cream to the top.


Add Kahlua, icing sugar, and vanilla to one cup of whipping cream.


Add one teaspoon of vanilla pudding powder to the whipping cream. The pudding will stabilise the cream so that it wont get watery.


Whip it. Whip it good.


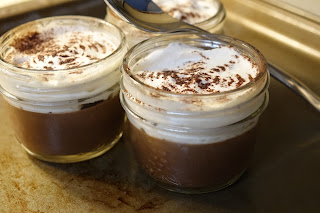
Top the chocolate with the cream. Sprinkle with a bit of cocoa powder for a garnish


I think these 125 ml mason jars are just perfect for serving this great Christmas dessert.


Blender Kahlua and Cream Chocolate Mousse

1 heaping cup chocolate chips( I like to use half bittersweet and half semi sweet chocolate)
2 eggs
1 teaspoon vanilla
1 teaspoon instant espresso powder
4 tablespoon Kahlua
2 tablespoons sugar
pinch of salt
1 cup whipping cream

Kahlua Flavoured Whipped Cream

1 cup cold whipping cream
1 tablespoon Kahlua
1 tablespoon icing sugar
1 teaspoon vanilla
1 teaspoon instant vanilla pudding powder

Combine chocolate, eggs, vanilla, espresso powder, Kahlua, sugar and salt into a blender jar. Pulse a few times to break the chocolate into small bits. Bring the cream to a boil over medium heat. Watch it carefully as it will scorch easily. Pour the hot cream over the chocolate mixture. The heat of the cream will cook the eggs. Blend on high for three minutes. Pour mixture into small containers. Refrigerate until firm.

For the whipped cream. Combine cream, Kahlua, sugar, vanilla, and pudding powder into a medium sized bowl. Whip with electric mixture until firm. The pudding powder will keep the whipped cream from becoming watery. Top chocolate pots with whipped cream. Sprinkle the tops with cocoa powder to garnish. Refrigerate. Will keep for a few days in the fridge.


Wednesday 29 April 2015

Lemon Berry Cream Cake


The perfect summer dessert. Make ahead, no bake and it feeds a ton of people.
Made with the easiest lemon curd made completely in the microwave.
Oh! My! Gosh! It is so good!


Start by making the lemon curd. The easiest lemon curd there is. Make it completely in the microwave. Zest four teaspoons of lemon zest.


Then,  squeeze enough lemons to make 1 cup of freshly squeezed juice. Should be about three or four lemons.


Lightly beat  four eggs.


Combine one cup of sugar with the eggs.


Add the lemon zest and lemon juice.


Lastly,  add the melted butter. Let the butter cool a bit before adding it so you don't cook your eggs.


Microwave on high, in one minute intervals until thickened. Stir well after each minute. It should take 6-8 minutes.


The lemon curd is cooked enough when it coats a spoon. Cover with plastic wrap and refrigerate until completely cooled.


While the lemon curd is cooling, combine one liter of cream with brown sugar, vanilla and pudding powder. Stir to dissolve sugar. Whip on high with electric mixer until cream is whipped firmly. I always add a bit of instant vanilla pudding powder to my whipped cream. The thickening agents in the pudding powder will prevent the cream from deflating and becoming watery.


In another bowl combine 8 ounces of room temperature cream cheese and one cup of icing sugar. Mix with electric mixer until well combined.


Divide the whipped cream in half.


Add half of the whipped cream to the cream cheese mixture. Fold, gently until combined.


Add the cooled lemon curd to the other half of the whipped cream. Fold gently to combine.


Place graham wafers onto the bottom of a 9x13x2 inch baking pan.


Use a serrated knife to trim the cookies to fit the entire surface.


Spread half of the lemon mixture onto the graham wafers.


spread the mixture right to the edge.
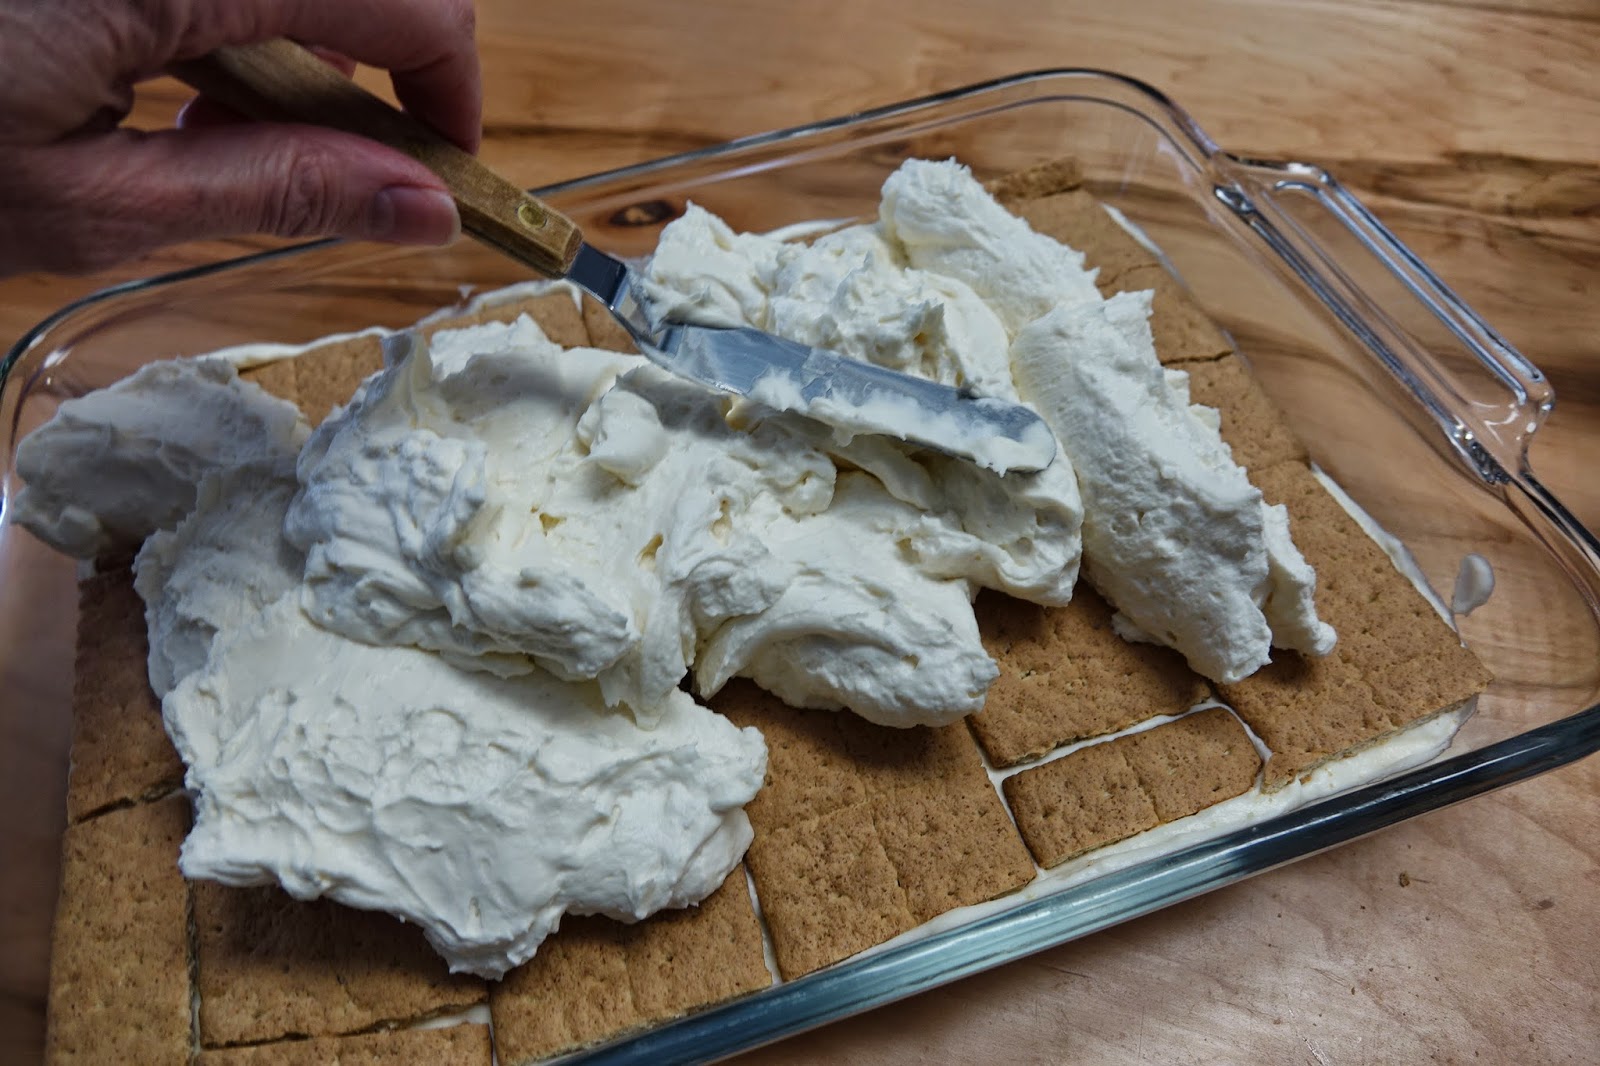

Put another layer of wafers on top of the lemon layer.


spread all of the cream cheese onto the wafers.


Add another layer of graham crackers.


Spread the remaining lemon layer on top.


Cover the entire surface with berries. Raspberries, blueberries, or blackberries.


Cover the cake with plastic wrap and refrigerate over night. You could easily make this cake two or three days in advance. The graham crackers need time to soften.
I put blueberries and raspberries on this cake.


This one is all raspberries. I think that you could make a pretty nice American flag with blueberries and raspberries. Try it for July fourth.


Lemon Berry Cream Cake

Easy Microwave Lemon curd
1 cup sugar
4eggs
1 cup lemon juice
1/2 cup melted butter, cooled a bit

1liter whipping cream
1/3 cup brown sugar
1 teaspoon vanilla
2teaspoons instant vanilla pudding powder(optional but recommended)

8 ounces cream cheese
1 cup icing sugar

About 50 Graham wafers

4 cups berries washed and dried(raspberries, blueberries, blackberries)

First make the lemon curd
Combine the eggs and sugar in a microwave safe bowl. Add the lemon juice and melted butter. Mix well. Microwave on high in one minute intervals, stirring after each minute, for six to eight minutes. Cook until the mixture has thickened and it coats the back of a spoon. Cover and refrigerate until
cool.

Meanwhile
Make the cream. Combine whipping cream and brown sugar. Stir to dissolve the sugar.  Add vanilla and pudding powder(optional). The pudding powder helps to stabilize the whipping cream. The cream will stay whipped and will not separate. Whip with electric mixer until stiff. Set aside.

Then
Mix the cream cheese and icing sugar with an electric mixer until smooth. Fold half of the whipped cream into the cream cheese mixture. Mix gently as to not deflate the cream.

Next
Combine the other half of the whipped cream into the lemon curd. Fold to mix well.

Assemble the cake
Place Graham crackers onto the bottom of a 9x13x2 inch baking dish. Cut crackers to fit the entire surface. Put half of the lemon cream mixture on top of the Graham crackers. Spread the cream with a spatula to cover the entire surface of crackers. Put a layer of crackers on top of the lemon cream. Put the cream cheese layer on top of the crackers. Place the other half of lemon cream on next. Cover entire surface with berries (raspberry, blueberry, blackberry etc). Cover with plastic wrap and refrigerate over night.
The cake needs time for the graham wafers to become softened. Overnight is sufficient. This cake could easily be made a couple of days in advance.

The cake will be assembled as follows from the bottom to the top
Graham crackers
Lemon cream
Graham crackers
Cream cheese
Graham crackers
Lemon cream
Berries


Saturday 22 November 2014

Cinnamon Biscuit Rolls

Requested by my son, this is one of his favourites. They are similar to traditional cinnamon rolls with an easier, quicker dough.These rolls are great for breakfast or a simple dessert. The recipe is my basic buttermilk biscuit recipe. It is very versatile and easy. Sometimes I make sweet rolls, such as these, and sometimes I make savoury biscuits by adding cheese or herbs. The savoury ones are great to have with soup or salad. See the recipe for pizza biscuit rolls.

 I like to have my kids help in the kitchen. I think that knowing how to cook basic food is a life skill that everyone should know. Not only will they be able to feed themselves but they will be less likely to reach for unhealthy, pre-packaged foods. Watch my son and I make them on You Tube.
Combine the dry ingredients. Cut the cold butter into one inch cubes and add them to the flour mixture. Using a pastry cutter or knives, cut the butter into the flour. Keep cutting the butter until it is the size of small peas. Work quickly so that the butter does not  become too warm.
You want small pieces of butter, surrounded by the flour mixture. This is what helps these biscuits to be light and fluffy
Make a well in the centre of the flour/butter mixture. Add the buttermilk to the bowl. Buttermilk is acidic. The acid in the buttermilk help to create a tender biscuit. If you don't have buttermilk, you can make buttermilk by adding one tablespoon of vinegar or lemon juice to the milk. Let the milk sit with the vinegar for about 10 minutes. The acid in the vinegar will curdle the cream in the milk making a sort of pseudo-buttermilk.  Stir the milk into the flour mixture until the mixture comes together in a ball. Turn the ball out onto a floured counter and kneed gently until it comes together.
Roll dough out to a rough 10x5x1/4 inch rectangle. Dust with flour as necessary to prevent the dough from sticking to the counter.
Spread the surface of the dough with the softened butter. Use real butter. Do not substitute margarine. Butter is a natural product with no preservatives or chemicals. Have a look at the ingredients of   margarine. 
Rule of thumb, if you can't pronounce the ingredients, do not eat the food.
If you're going to eat fat, eat natural fat.
Sprinkle the butter with brown sugar
Sprinkle the sugar with cinnamon
Starting at the edge that is furthest away from you, gently roll the dough.
Squeeze the dough to seal the edge. I slice each end off (Seth usually eats them, he loves raw dough)
Slice the dough into one inch slices. See a great tip on my video on how to get even slices.


Place the slices onto a parchment lined baking sheet
Bake the rolls in a 375 degree oven for 15 to 20 minutes or until golden brown
Approved by Seth


Cinnamon Biscuit Rolls

Basic Buttermilk Biscuits
3 cups all purpose flour
3 tablespoons  sugar
3/4 teaspoon salt
3 teaspoons baking powder
3/4 teaspoon baking soda
3/4 teaspoon cream of tartar
3/4 cup cold butter
1 1/2 cup buttermilk

The cinnamon part
1/2 cup soft butter
1 cup brown sugar, packed
1 teaspoon ground cinnamon

Combine the first six ingredients into a large bowl. Mix to combine. Cut the butter into one inch cubes. Add butter to flour mixture. Using a pastry blender on two knife cut the butter into pea sized pieces. Make a well in the centre of flour/butter mixture. Pour buttermilk into the well. Mix until a ball forms and most of the dry ingredients are wet. Turn ball out onto a floured counter and need a few times until everything has come together, adding flour as necessary to stop the dough from sticking to the counter. Roll dough out into a 10x15x1/4 inch rectangle. Spread the butter evenly over the dough. Spread the brown sugar evenly over the butter. Sprinkle the sugar evenly with the cinnamon.
Roll the dough into a spiral. Slice it into 1 inch slices. Place slices onto a parchment lined baking sheet, spacing them about an inch apart. Bake at 350 degrees for 20 minutes or until they are golden brown.